How to Shoot Films Like BBC's Planet Earth
BBC’s Planet Earth is a spectacle of nature, a ‘thing of beauty’, and a masterclass in cinematography. I was asked to replicate this look, and after a week of disappointing shoots and mishaps, capturing nothing but trashcan-worthy footage, I finally figured out how to do it.
There is no denying that the BBC Natural History Unit stands head and shoulders above the rest when it comes to filming our beautiful planet, whether it is in the sea, across the desert, or in the jungle. I have done my fair share of water-based filming over the years during my time at the RNLI, and my first freelance job was spent filming all across the Devonshire parks, but when I won a pitch in 2021 to film the ‘fibres of the forest’ and Planet Earth was a reference, I knew I had to step it up a notch.
I planned to shoot one, maybe two days…I ended up shooting six with about 70% of that footage all coming from day five.
Now why on Earth did it take me more than 3x as long to achieve this as I had hoped? Well, as I learned, which is something any wildlife filmmaker will already know, is there is only so much you can do with nature, before you have to wait for it to do something for you.
In this article, I will give you the four biggest pieces of advice for anyone wanting to film in forests and achieve a Planet Earth look.
Tip #1: No Sun? Don’t Even Bother.
I have filmed in the rain more than anyone I know. It doesn’t help I live in England, it helps even less so much of my work has been spent outdoors across the last 10 years. So when the weather was gloomy and drizzling, which it was on the first day, it didn’t bother me in the slightest. I went into the forest with high hopes only to shoot almost an entire day of useless footage. I then naively made the same choice the next two days as well, fearful that the weather was only going to get worse the longer I left it (and in my defence, the weather forecast in England changes hourly).
End result? Four days of flat, grey, lifeless footage. The only footage in here from the first four days is the macro footage, and that is only because I had brought a collaborator along that day to help who had very helpfully brought a battery powered tube light, so we could at least add some contrast to the macro clips. Without that tube light, I don’t think any of the footage would have made it into the film.
Tip #2: Backlight Everything
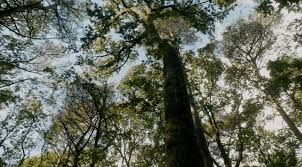
This rule is a rule for all cinematography to be fair, narrative or documentary, but I had not realised just how crucial it was when filming trees. When you frontlight (i.e. film with sun behind your back) in a woodland, the depth of trees can look nice if you have enough foliage to give you some dabbled lighting, but it is like bringing a spoon to a sword fight compared to backlighting. When light spills through the trees from in front of you, it breaks up the dense brown woodland and turns a forest into magic.
Tip #3: Sliders, Gimbals, Cranes, Tripod…Anything but Handheld
If I could change one thing in my process, it would be my patience to set stabilising equipment up. On day one, we used a telescopic slider, the Moza Slypod. Honestly, I thought it would be a winner compared to the hassle of a slider and let me get inside unique viewpoints like the inside of a hollowed out tree trunk. What actually happened is it became incredibly awkard to rig, the app barely worked, and it seemed to have a mind of its own half the time. Plus, despite using a relatively light camera (Sony FX3 with sigma lenses), it didn’t handle the weight very well. All the macro shots you see are filmed with this, but I ended up getting frustrated and resorting to handheld and tripod shooting. This pushed me to shooting at 50fps for slow motion more than I had wanted to do and I barely used the moza sylpod after the first day.
skip to day five, having shot basically nothing useful for four days prior, I charged my awkward and temperatmental Movi M10 gimbal, strapped its stand to my backpack, and set off into the forest again. I should have done this from day one.
Yes this particular gimbal is severely underwhelming compared to the modern gimbals of today, and it sure as hell was a clunky experience hiking through woods on my own with this particular gimbal set up with the camera, but most of the footage (at least all of the best footage) in the film is from this day, when I was using this gimbal.
In hindsight, I should have planned more shoot days but taken it slower on each day, setting up controllable and reliable pieces of equipment that provide smooth stable footage. Prior to this I had really devalued sliders in my head, mostly because it was one of the first bits of kit I bought and I absolutely hated it at the time, but now I often find myself thinking ‘I wish I had a motorised slider with me’ when filming in studios or woodlands.
You might need a second pair of hands to achieve it, but it is most definitely the way to go.
Tip #4: Focal Lengths and Sensor Size
Most of this footage was shot either on the 100mm macro canon lens, the 24mm probe lens, or the Sigma Art 24mm, very little of it was shot with anything in between 24-100mm. That’s not to say my approach is right, but for what I was doing, I found either a macro lens or a wider lens with a close minimum focus were essential to isolate specific details in a shot and create a sense of travel in the image without compromising stability.
When I made this film, the Sony FX3 was relatively new and was new to me, and after three days of disappointment, I was willing to try anything, so on day 4 I swapped my FX3 out for my old Fuji XT3, thinking that would solve the problem…of course it didn’t. The smaller sensor and colour sampling meant day four was possibly the worst footage of all, especially when it was compounded by depressingly dark clouds. I went back to the Sony FX3 for the final two days and found myself quickly appreciating the full-frame sensor I had so stupidly tried to blame.
When working in nature, you want to capitalise on that light as much as you can and it definitely helps having the larger sensor size give you some flexibility to separate elements of nature more than you can on a smaller sensor.
Don’t forget to look after yourself if filming in the forest, look out for tics, bring water and sun screen, and make sure you always have a way to navigate back to where you started!